Understanding the Pool Construction Process: A Step-by-Step Guide for Homeowners
Building a custom pool is one of the most exciting upgrades you can make to your home—but it also comes with a lot of questions. What’s involved? How long will it take? Who handles the permits?
At Clarkson Pools, we believe in transparency and teamwork. Whether you’re just starting to explore pool options or you’re already dreaming up the perfect design, understanding the process can help you feel confident from day one.
Here’s a step-by-step look at how we bring your backyard vision to life, the Clarkson way.
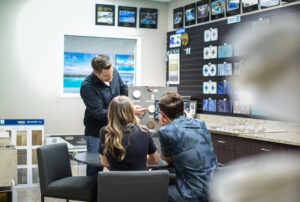
Every project starts with a conversation. We’ll meet to discuss your vision, your lifestyle, and your property’s unique layout. From pool shape and size to finishes, features, and functionality, our experienced designers guide you through every choice. We’ll also cover budget, HOA guidelines, and timelines so there are no surprises.
Step 2: Permitting & Engineering
Once your design is finalized, our team gets to work behind the scenes. That includes submitting your plans to local municipalities and HOAs, securing permits, and coordinating with engineers. We handle all of this for you—keeping your project compliant and on track.
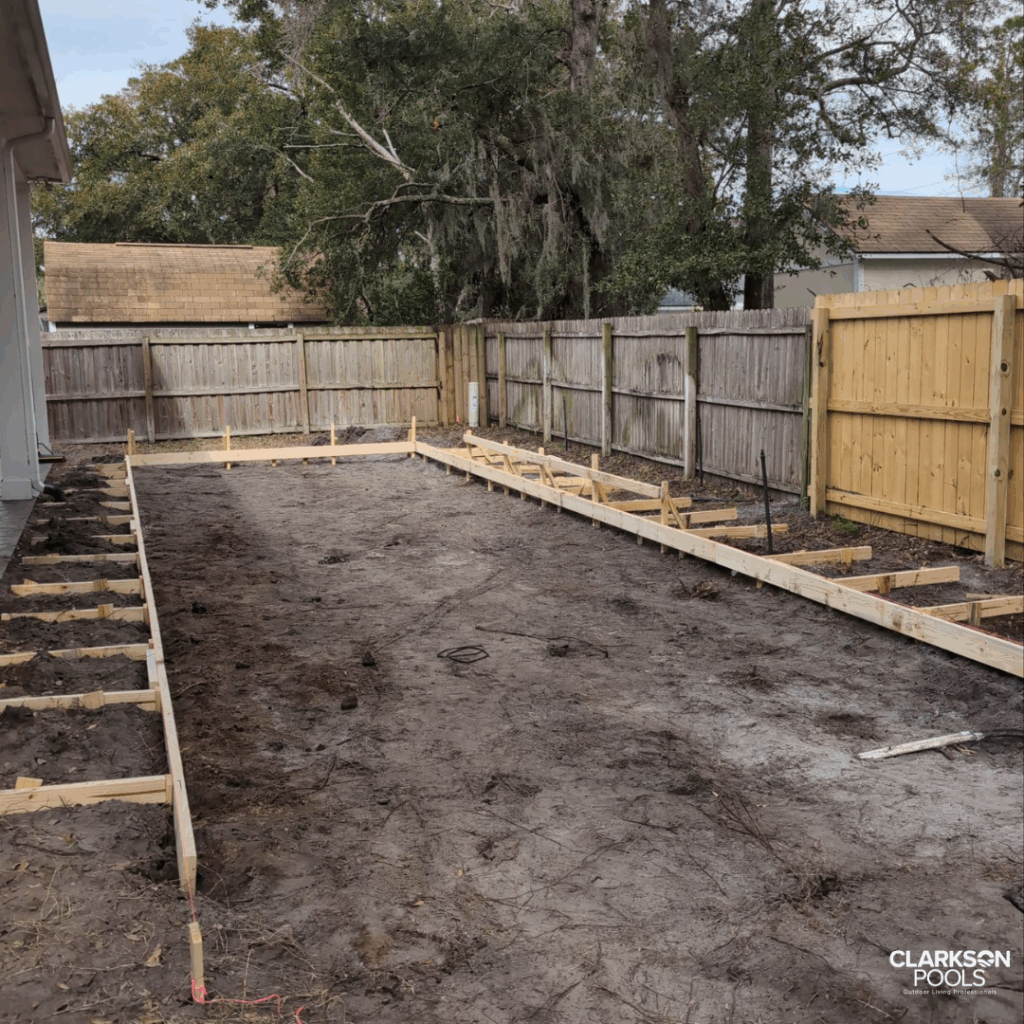
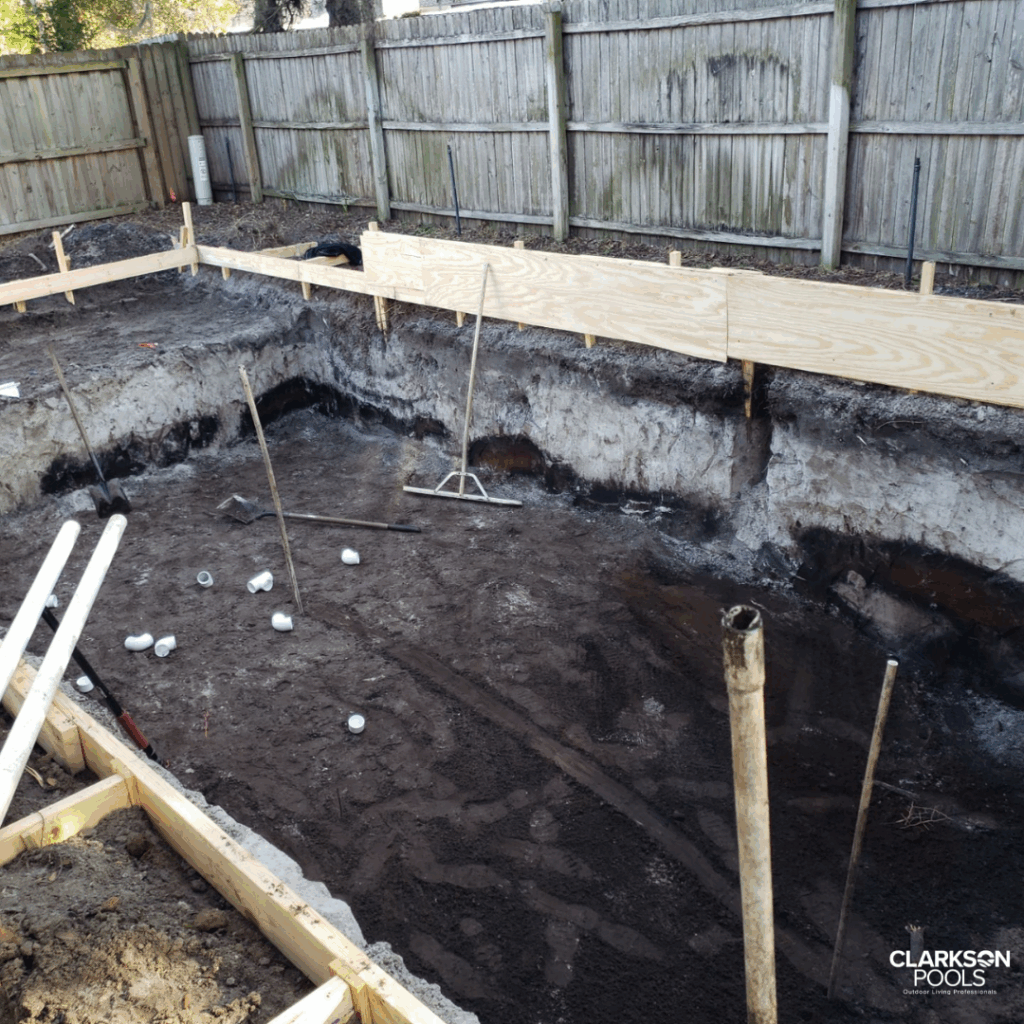
Step 3: Layout & Excavation
With approvals in hand, we mark your pool’s exact location on-site and begin excavation. Our crews carefully dig the shape and depth of your pool, accounting for soil conditions and drainage to ensure a stable foundation.
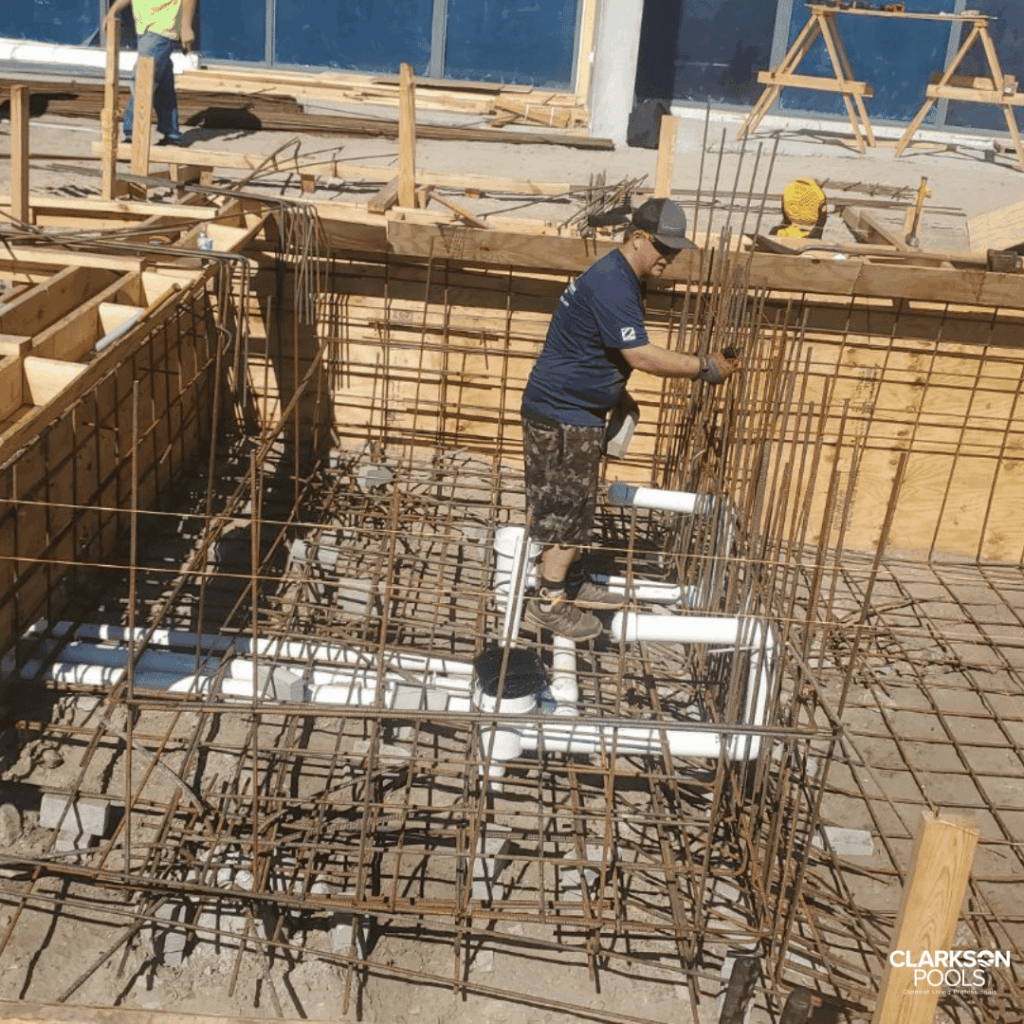
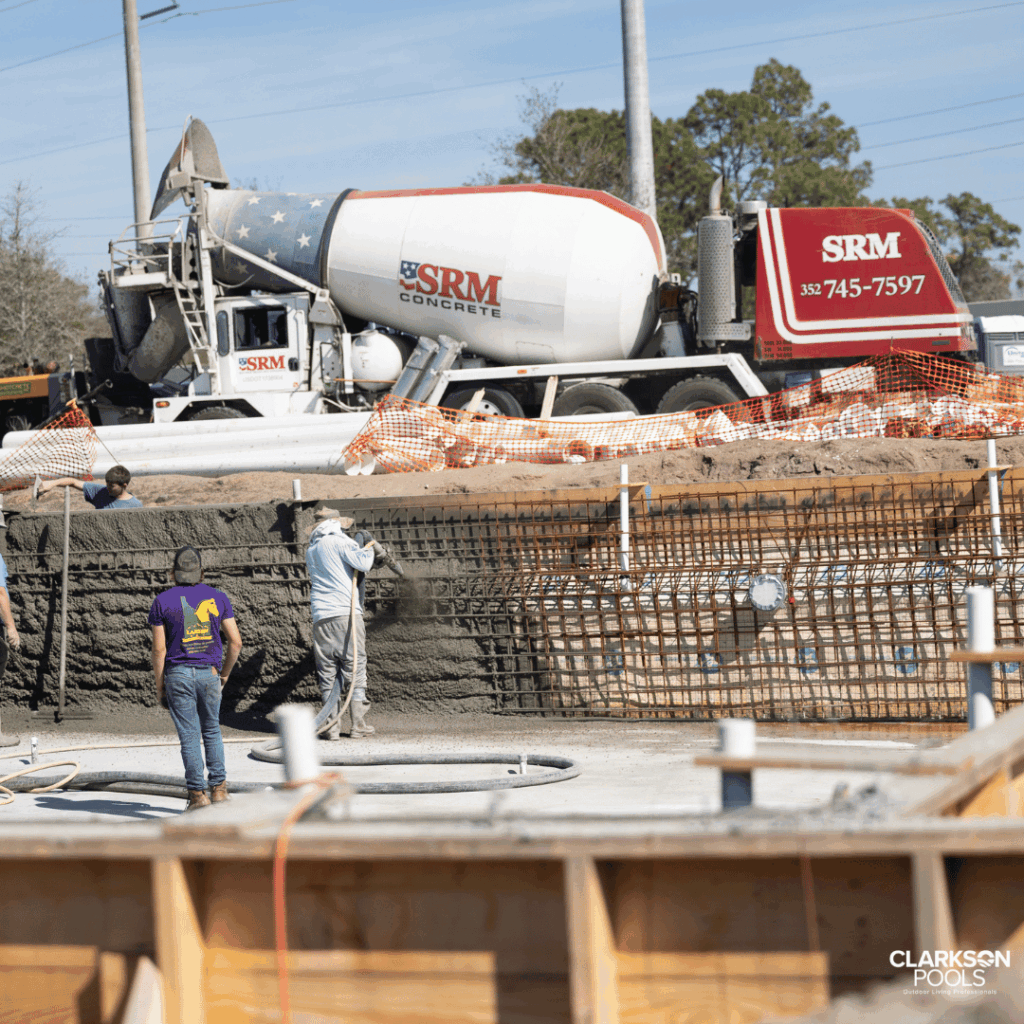
Step 4: Steel, Plumbing & Electrical
Now it’s time to build the backbone of your pool. Steel rebar is installed to reinforce the structure, followed by underground plumbing lines and electrical conduit for lighting and equipment. Everything is carefully inspected and pressure-tested before we move forward.
Step 5: Shotcrete Application
The concrete shell of your pool is created using shotcrete—a high-pressure spray application that forms the core structure. Once applied, the shotcrete needs time to cure and harden before finishing work can begin.
Step 6: Tile, Coping & Decking
Here’s where style really starts to shine. Waterline tile, edge coping, and decking materials are installed using high-quality, durable options that match your vision. This phase brings the personality of your outdoor space to life.
Step 7: Equipment Installation & Start-Up Prep
We install all necessary equipment, including pumps, filters, lighting, and automation systems like Jandy iAquaLink®, so you can control your pool from your phone. Our team ensures every component is connected, calibrated, and ready for use.
Step 8: Interior Finish & Fill
Once construction is complete, it’s time for the final interior finish. This step gives the water its color and texture. After the finish is applied, we fill the pool and begin balancing the water chemistry.
Step 9: Final Walkthrough & Pool School
Before we wrap, we’ll schedule a final walkthrough and “Pool School.” Our experts show you how to operate your system, understand water chemistry, and care for your new pool. We’ll also connect you with our Pool Care Team for ongoing maintenance and support.
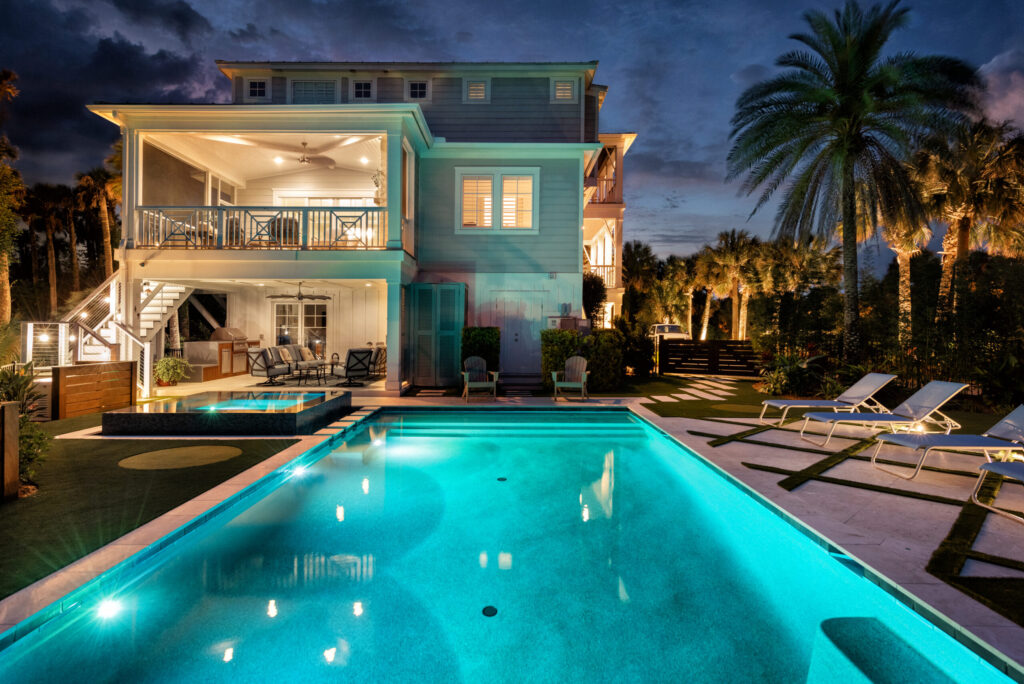
Ready to Dive In?
When you choose Clarkson Pools, you’re not just getting a pool—you’re gaining a trusted team with 35 years of experience in delivering Clarkson Quality across Northeast Florida. We’re here to make the process smooth, enjoyable, and exciting from the first sketch to the final splash.